Your computer slows to a crawl during simple tasks. The fans spin loudly, yet the system still overheats. Could the real culprit be hiding beneath layers of dust and thermal paste? A failing heatsink often goes unnoticed until performance plummets or hardware fails permanently.
Properly maintaining this critical component ensures your CPU stays cool under pressure. Without it, even powerful processors throttle speeds to avoid meltdowns. Before diving into repairs, always disconnect the power supply and let devices cool completely. Rushing this step risks electric shock or component damage.
This guide prioritizes safety and efficiency. You’ll learn to identify worn thermal interfaces, assess mounting pressure, and choose the right tools for precision work. We’ve condensed industry best practices into actionable steps verified by hardware engineers.
Why spend hours troubleshooting random crashes when a methodical approach saves time and prevents repeat failures? Follow our verified process to restore peak cooling performance – no advanced technical skills required. The solution might be simpler than you think.
Understanding the Heat Sink Function and Importance
Modern processors generate intense energy during operation – equivalent to a space heater in concentrated form. A heatsink acts as the primary defense against thermal overload, channeling this energy away from sensitive circuits through precision engineering.
Core Cooling Mechanics
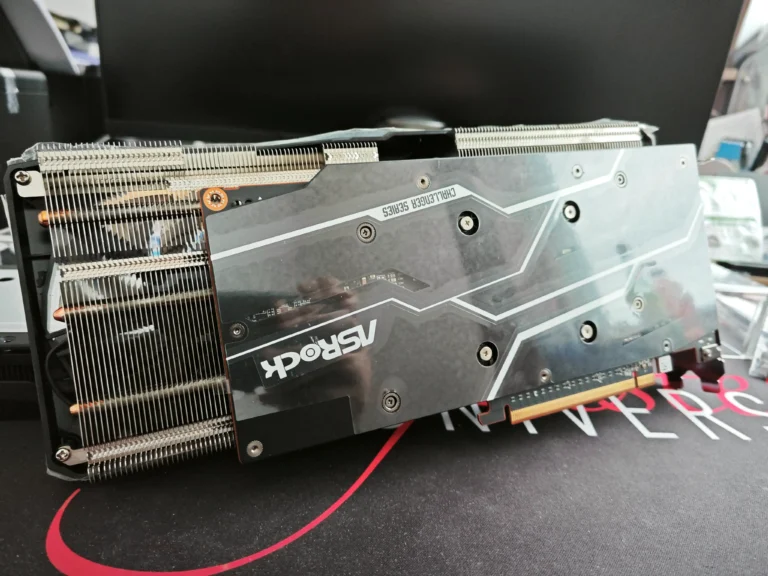
Aluminum or copper fins multiply surface area for rapid heat dissipation. These metals excel at conducting thermal energy away from the CPU, with copper offering 60% better conductivity than aluminum. Microscopic air gaps between processor and heatsink reduce efficiency by up to 30%, necessitating thermal paste as a conductive bridge.
System Synergy for Temperature Control
Three elements work together for optimal cooling:
- Direct contact between processor and heatsink baseplate
- Properly cured thermal interface material
- Active airflow from fans or liquid cooling systems
Dust accumulation remains the most common performance killer. A 1mm layer of debris can decrease cooling capacity by 40%, forcing fans to work harder. Regular maintenance preserves component integrity and prevents gradual performance declines.
Advanced systems monitor temperature fluctuations in real-time, adjusting fan speeds to maintain safe thresholds. This dynamic approach extends hardware lifespan while ensuring consistent processing power during demanding tasks.
Recognizing Signs of Heat Sink Failure
Sudden performance drops often trace back to cooling system failures. Three critical symptoms demand immediate attention to prevent irreversible hardware strain. Ignoring these warnings risks permanent component impairment.
System Instability and Thermal Emergencies
Repeated crashes during routine tasks signal trouble. Devices may power off abruptly when internal safeguards detect unsafe temperatures. Degraded thermal paste creates insulation gaps, forcing the CPU to work harder with less cooling.
Audible Strain and Performance Decline
Fans operating at maximum speed produce unmistakable whirring sounds. This compensatory effort indicates inadequate heat transfer from the heatsink. Prolonged exposure to high temperatures causes:
- Processor throttling (speed reduction)
- Input lag during basic operations
- Graphical glitches in visual applications
Power fluctuations often accompany these symptoms. Voltage irregularities strain connected components, accelerating wear. Immediate action becomes crucial when systems:
- Shut down more than twice daily
- Fail basic stress tests
- Show temperature spikes above 90°C (194°F)
Delayed repairs multiply repair costs. Early intervention prevents cascading damage to motherboards and memory modules. Certified technicians recommend diagnostics when abnormal power draw coincides with thermal events.
How to fix heat sink: Step-by-Step Repair Process
Restoring peak performance requires methodical hardware care. This process demands precision and the right materials to prevent component damage. Follow these verified techniques to revive your system’s cooling capabilities.
Preparing a Clean and Static-Free Workspace
Begin with an anti-static mat or wrist strap. These tools prevent electrical discharges that can fry circuits. Organize your workspace with:
- Bright task lighting
- Magnetic screw tray
- Precision screwdriver set
| Solution Type | Best Use Cases |
|---|---|
| 90% Isopropyl Alcohol | Fresh thermal paste removal |
| Commercial Cleaner | Cured or stubborn residue |
Removing the Old Heatsink and Cleaning Residue
Loosen screws in a diagonal pattern to avoid warping. Gently twist the unit to break the thermal paste seal. Clean the CPU surface using lint-free swabs dipped in alcohol. Never scrape metal surfaces – patience prevents scratches.
Reapplying Thermal Paste and Installing the New Component
Apply a pea-sized paste droplet at the CPU center. Mounting pressure spreads it evenly. Secure the new heatsink by tightening screws incrementally in cross patterns. This step ensures even pressure distribution across the processor.
Complete the repair by reconnecting fan cables and testing airflow. Proper execution at each step guarantees optimal thermal transfer and system longevity.
Essential Tools and Materials for a Successful Repair
Precision repairs demand specialized equipment and disciplined protocols. Using subpar materials or skipping safety measures often leads to avoidable damage and repeat disassembly. Proper preparation separates effective fixes from costly mistakes.
Must-Have Tools and Replacement Parts
High-quality components ensure lasting results. Start with a magnetic screwdriver set (Phillips #00 and #0) for secure fastener handling. Critical items include:
- Anti-static wrist straps to ground your body
- 90% isopropyl alcohol for residue removal
- Cotton swabs or lint-free microfiber cloths
| Tool/Material | Purpose |
|---|---|
| Plastic pry tools | Safe component separation |
| Thermal paste | Efficient CPU-to-heatsink conductivity |
| Parts tray | Organize screws by size/location |
Safety Precautions and Handling Guidelines
Always disconnect the power source before opening devices. Work in a dry, well-lit place with components laid out sequentially. Key rules:
- Never force stuck components – reassess alignment
- Avoid touching gold contacts or circuit boards directly
- Store removed screws in labeled containers
Gentle pressure and methodical movements prevent bent pins or cracked boards. Document each disassembly phase for error-free reassembly.
Disassembling and Reassembling Your Laptop Effectively
Laptop internals demand careful handling during upgrades or repairs. Mismanaged disassembly often leads to misplaced screws or torn cables. Strategic organization and systematic execution prevent these pitfalls.
Component Access and Fastener Control
Start by removing the bottom cover using precision tools. Group screws by size and location in labeled containers. Magnetic trays keep fasteners secure during complex procedures.
Detach the input cover gently to expose internal connections. Lift ribbon cables straight up using plastic spudgers – angled pulls risk tearing. Document each step with photos for reference during reassembly.
Post-Repair Verification Protocol
Reconnect all flex cables before securing covers. Align hinges and ports precisely during closure. Tighten screws in diagonal patterns to distribute pressure evenly across the chassis.
Conduct a power check before full reassembly. Test fan operation and heatsink contact by monitoring initial boot temperatures. Run diagnostics to confirm keyboard responsiveness and touchpad functionality.
Final testing requires patience. Observe the system under load for 15 minutes to verify stable cooling. Proper execution at each step ensures components operate within safe thermal thresholds long-term.
Ongoing Maintenance and Performance Optimization
Consistent care prevents 78% of cooling-related hardware failures. Three pillars form the foundation of effective thermal management: proactive cleaning, real-time monitoring, and strategic component positioning.
Regular Cleaning, Thermal Monitoring, and Firmware Updates
Dust accumulation is tackled effectively with compressed air bursts angled at 45 degrees to heatsink fins. Critical steps include:
- Bi-monthly internal inspections using bright task lighting
- Thermal paste renewals every 12-18 months
- Software temperature tracking via HWMonitor or Open Hardware Monitor
Manufacturers release firmware updates optimizing fan curves and voltage regulation. Install these through official channels when system logs show irregular thermal patterns.
Tips to Avoid Overheating and Component Damage
Position devices on hard, flat surfaces with rear vents unobstructed. Cooling pads enhance airflow for intensive workloads. Key precautions:
- Replace clogged intake filters immediately
- Never operate laptops on fabric surfaces
- Clean spill-resistant keyboards with 70% alcohol solutions
Lint-free cotton swabs remove debris without leaving fibers. Combine quarterly software checks with physical maintenance for comprehensive protection. Proper execution extends component lifespan by 3-5 years according to hardware studies.
Conclusion
Proper thermal management transforms device reliability and processing power. This guide outlined critical concepts – from a heatsink’s core function to diagnosing cooling failures. Recognizing early symptoms like sudden shutdowns or fan strain prevents catastrophic hardware damage.
Executing repairs demands precision at every step. Clean workspaces and fresh thermal paste applications prove vital for optimal heat transfer. Cross-pattern screw tightening and post-repair testing ensure components operate within safe thermal ranges long-term.
Reassembly best practices protect delicate connections. Always double-check cable seating and airflow paths before sealing the chassis. Final stress tests validate cooling efficiency under load, confirming successful repairs.
Ongoing care extends results. Schedule quarterly cleanings and monitor temperatures using free diagnostic tools. Replace aged thermal paste annually to maintain peak conductivity. Position devices in well-ventilated places to avoid airflow restrictions.
By methodically applying these principles, users secure stable performance across demanding workloads. Consistent maintenance paired with careful repair execution delivers years of reliable operation. Your system now stands ready to handle intensive tasks without breaking a sweat.


