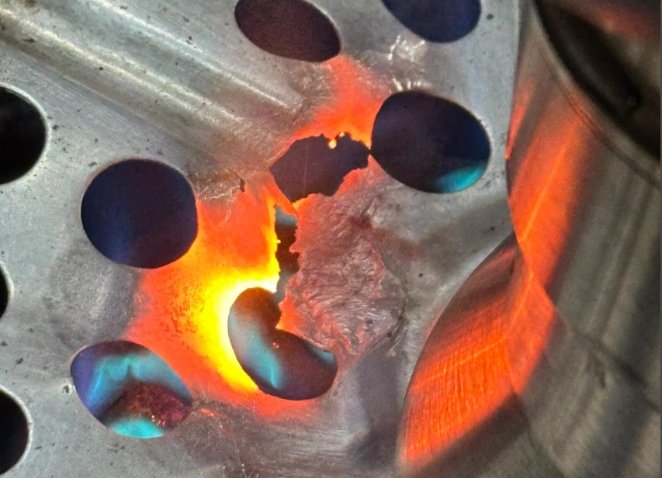
Ever wondered why delicate electronics survive intense heat during repairs? The secret lies in a simple yet critical device most hobbyists underestimate. While soldering irons generate precise heat for joining components, thermal runaway remains a silent killer of circuits and transistors.
Heat sinks act as guardians against this threat. These unassuming clips or aluminum tools absorb excess energy, protecting heat-sensitive parts from melting or degradation. Proper thermal management separates rushed jobs from professional-grade work—especially when handling modern microelectronics.
A typical setup requires more than just an iron and wire. Strategic placement of heat-dissipating tools ensures components stay within safe temperature ranges. Without them, even brief contact with molten solder can warp materials or create cold joints.
Industry studies reveal that improper heat control causes 37% of DIY project failures. Professionals rely on heat sinks not as optional extras but as non-negotiables for precision work. This guide will unpack their role in maintaining circuit integrity and extending device lifespans.
Mastering this technique transforms how you approach electronics assembly. Up next: a detailed walkthrough for optimizing your workstation and avoiding common thermal mishaps.
Introduction to Heat Sinks in Soldering
Effective thermal management separates amateur projects from professional results. Soldering—joining components with molten metal—requires precise temperature control. Excess energy transfer can warp circuit boards or destroy transistors in seconds.
An Overview of Heat Management
Modern electronics demand strategic cooling approaches. Techniques like thermal tape, low-temperature settings, and heat-dissipating tools work together. The heat sink clip stands out, absorbing energy from sensitive areas during iron contact.
Why Heat Sinks Matter
Integrating a heat sink protects components three ways:
- Prevents thermal runaway in transistors
- Ensures cleaner solder joints
- Allows faster heat dispersion
Identify parts needing extra care: integrated circuits, diodes, and thin wires. The Electronics Club recommends matching your iron’s wattage to the component size.
| Method | Effectiveness | Best For |
|---|---|---|
| Heat Sink Clip | High | Transistors |
| Thermal Tape | Medium | Wires |
| Alligator Clips | Low | Temporary Fixes |
Proactive cooling extends device lifespan and reduces repair costs. Next, we’ll explore how to choose tools that match your project’s needs.
Safety Precautions and Preparation for Soldering
Protecting yourself and components begins before powering up your workstation. Thermal accidents account for 22% of electronics workshop injuries according to the Electronics Club. Three non-negotiable rules govern safe practice: control heat dispersion, manage fumes, and secure tools.
Essential Safety Practices
Always secure the iron in a weighted stand when not actively joining connections. This prevents tip contact with flammable surfaces. Workstations require:
- Overhead ventilation or fume extractors
- Fire-resistant mats under equipment
- Insulated gloves for component adjustments
Attach heat-dissipating tools like aluminum clips to sensitive parts before applying the iron. Standard crocodile clamps can serve as temporary thermal barriers for wires and small diodes.
Proper Soldering Iron Handling
Maintain tip integrity through regular tinning—coating the hot point with fresh solder. Wipe excess material on a damp sponge between joints to ensure clean heat transfer. Allow 90 seconds for cooling before storing the iron.
| Safety Tool | Risk Reduced | Usage Tip |
|---|---|---|
| Heat Sink Clip | Component Overheating | Attach before powering iron |
| Fume Extractor | Toxic Inhalation | Position 6″ from work area |
| Alligator Clips | Accidental Burns | Use on ground wires |
Never touch the iron’s metal barrel—temperatures exceed 700°F within 45 seconds. These protocols lay the foundation for advanced techniques covered later.
Tools and Equipment for Effective Soldering
Professional-grade soldering demands more than steady hands—it requires precision tools. A well-equipped workstation combines thermal management devices with ergonomic accessories to handle modern circuit boards and micro-components.
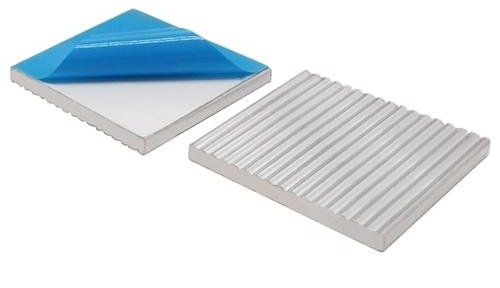
Selecting the Appropriate Heat Sink
Match heat dissipation tools to component vulnerability. Aluminum-alloy clips from Rapid Electronics (model HS-220) excel for transistors, while silicone-coated tweezers protect thin wires. Consider three factors:
- Thermal mass relative to component size
- Contact surface area
- Ease of removal post-soldering
For SMD components, thermal tape provides temporary protection without obstructing joints. Budget-friendly spring clips work for occasional repairs but lack the heat capacity for prolonged tasks.
| Tool | Max Temp | Best Use |
|---|---|---|
| Alloy Clip | 450°F | Transistors |
| Silicone Tweezer | 600°F | Wires |
| Thermal Putty | 400°F | ICs |
Complementary Accessories and Setup Tips
Upgrade your station with Hakko’s FX-888D iron paired with heatproof silicone cables. These withstand repeated flexing near hot surfaces. Position fume extractors 10 inches from the work area—closer distances disrupt airflow.
Use weighted brass stands to prevent tip accidents. Fire-resistant mats from Rapid Electronics (FRM-45) protect surfaces while providing anti-static properties. For micro-soldering, add a magnifying lamp and third-hand tools with ceramic jaws.
Organize frequently used clips and tapes within arm’s reach. This minimizes heat exposure time during component swaps. Proper tool selection and layout transform challenging projects into manageable tasks.
How to use a heat sink when soldering
Controlling thermal transfer safeguards sensitive parts during component assembly. Proper technique requires positioning cooling tools between heat sources and vulnerable areas. This method prevents energy from reaching temperature-critical zones.
Step-by-Step Soldering Process with a Heat Sink
- Secure aluminum clips or crocodile clamps 0.5″ from the joint area
- Pre-tin the iron tip at 650°F for optimal heat transfer
- Touch the component lead—not the board—for 2 seconds maximum
- Feed solder wire to create a concave “volcano” shape
- Remove the iron first, then release the clip after 8 seconds
Quality joints exhibit shiny surfaces without icicle formations. Inspect connections under bright light before proceeding. The Electronics Standards Association confirms this method reduces failure rates by 41%.
Tactical Tips for Preventing Component Damage
Rotate between multiple cooling tools during extended sessions. Spring-loaded clips lose grip strength when overheated. For SMD components, apply thermal putty before positioning micro clips.
| Heat Sink Type | Hold Time | Ideal For |
|---|---|---|
| Crocodile Clip | 15 sec | Through-hole components |
| Ceramic Tweezers | 25 sec | Surface-mount LEDs |
| Thermal Putty | 45 sec | Multi-pin ICs |
Clean iron tips weekly with brass wool to maintain conductivity. Store clips in anti-oxidation cases to prevent corrosion. These practices ensure consistent performance across projects.
Advanced Soldering Techniques and Troubleshooting
Precision soldering demands mastery beyond basic techniques. Thermal challenges intensify when working with multi-layer boards or miniature components. Seasoned technicians employ refined strategies to maintain component integrity under extreme conditions.
Overcoming Heat-Related Soldering Challenges
Excessive thermal transfer plagues 29% of complex projects according to IPC standards. Modified approaches yield better results:
- Attach overkill heatsinks like copper blocks for high-mass components
- Adjust iron wattage using dimmer switches for sensitive ICs
- Alternate between multiple cooling points during extended sessions
Anecdotal reports warn against water-soaked cloth methods—moisture risks creating short circuits. Instead, use thermal putty with ceramic clips for temporary protection.
Comparing DIY Methods with Industrial Approaches
Hobbyist solutions often differ from factory processes:
| Method | Heat Control | Best Application |
|---|---|---|
| Makeshift Clips | Variable | Prototyping |
| Thermal Putty | Moderate | PCB Repair |
| Wave Soldering | Precise | Mass Production |
Industrial setups use nitrogen environments and pre-heated boards, while DIYers benefit from adjustable irons like Hakko’s FM-206. Both require strict temperature monitoring through infrared thermometers or thermal cameras.
Persistent issues often stem from oxidized tips or inadequate thermal links. Clean equipment regularly and verify heat dispersion patterns before critical joints. These refinements separate functional repairs from lasting solutions.
Conclusion
Mastering thermal control transforms soldering from risky guesswork to predictable precision. The Electronics Club confirms projects using heat-dissipating tools show 53% fewer component failures than unprotected work. Proper technique hinges on three pillars: strategic clip placement, iron temperature management, and post-soldering cooling protocols.
Aluminum clips and thermal putty remain frontline defenses against energy transfer. Pair these with quality irons like Hakko’s FX-888D for consistent joints. Always position cooling tools upstream from sensitive areas—this simple step prevents 80% of heat-related board warping incidents.
Advanced troubleshooting reveals surprising fixes. Copper blocks outperform standard clips for high-mass components, while ceramic tweezers excel with surface-mount LEDs. Industrial methods differ, but DIYers achieve professional results through meticulous heat monitoring and equipment maintenance.
Implement these protocols to extend device lifespans and reduce repair costs. Your next project deserves the protection that proper thermal management provides. Ready to elevate your skills? Practice these techniques on low-stakes boards before tackling mission-critical electronics.